Display Custom Attribute of an Entra ID (Azure AD) User in Employee Directory
Extension attributes in on-premise Active Directory (AD) allow organizations to extend directory objects with new attributes tailored to their specific needs. These custom attributes can be synchronized with Microsoft Entra ID, enabling seamless integration across platforms.
Once synchronized, these attributes can be displayed on SharePoint sites and Microsoft Teams using the Employee Directory web part, enhancing user visibility and accessibility.
This article provides a comprehensive guide on how to set up the Employee Directory web part to display custom attributes of user objects from Entra ID.
Attribute Name
Custom extension attributes in Entra ID are not named the same way as they are in on-premises AD. For instance, an attribute like fax in on-premises AD will have a different naming convention in Entra ID. The format for custom attribute names in Entra ID is as follows:
extension_{uniqueid}_attributeName
To effectively use these custom attributes, you must retrieve their names from Entra ID.
Precondition
Before proceeding, ensure that you have the necessary PowerShell modules installed to interact with the Microsoft 365 environment. Open PowerShell and run the following commands to install the MSOnline and AzureAD modules:
Install-Module -Name MSOnline
Install-Module -Name AzureAD
Connect to Your Environment
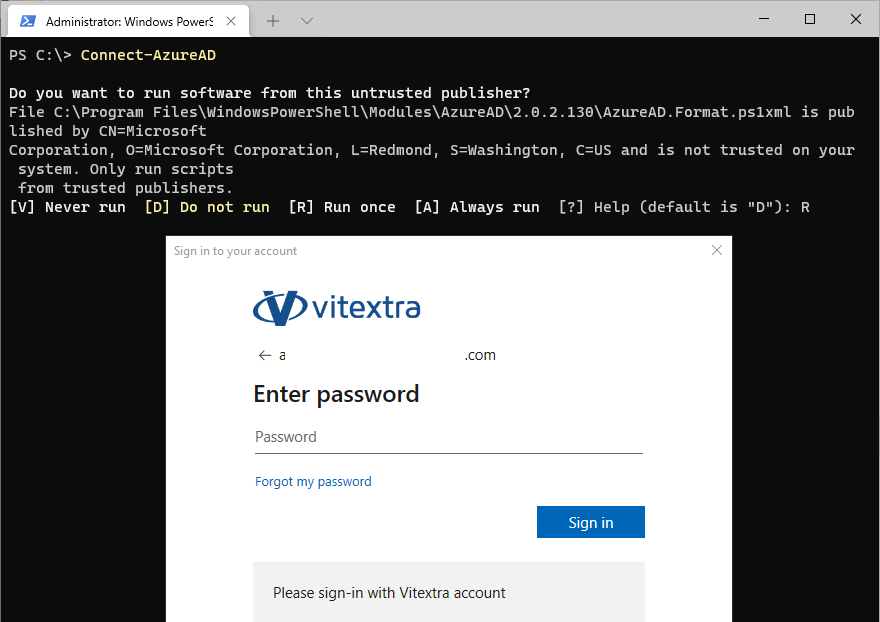
To connect to your Microsoft 365 environment, execute the Connect-AzureAD cmdlet:
Connect-AzureAD
You will be prompted to sign in with your corporate account. This connection is essential for accessing and managing your Entra ID attributes.

Getting Custom Attributes
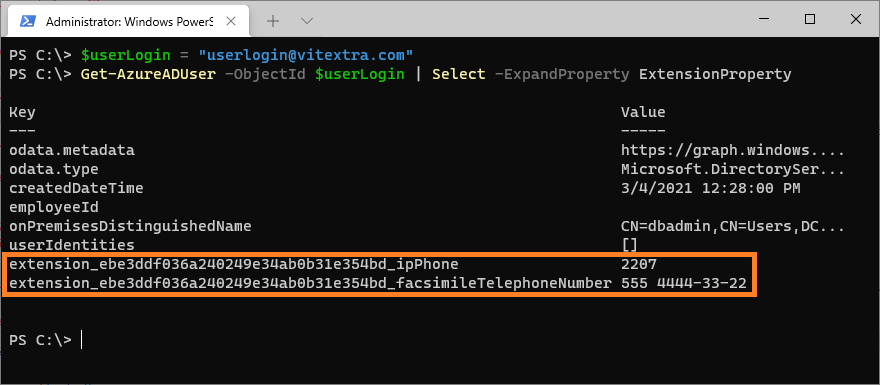
To retrieve custom attributes, replace dbadmin@vitextra.onmicrosoft.com with the user login in your Entra ID that has the necessary attributes. Run the following script:
$userLogin = "dbadmin@vitextra.onmicrosoft.com"
Get-AzureADUser -ObjectId $userLogin | Select -ExpandProperty ExtensionProperty
This command will list the extension properties that can be utilized as custom attributes in the Employee Directory web part.

Web Part Properties
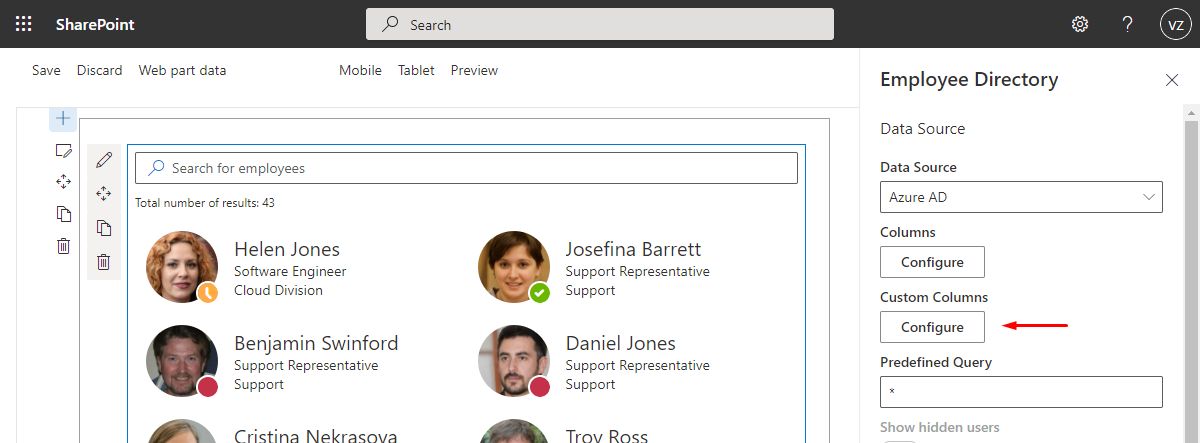
To configure the Employee Directory web part, navigate to the page where the web part is placed and enter edit mode. Access the web part settings and select Configure under the Custom Columns heading:

Add the custom attributes to the list and click the Save button to apply your changes.

📝 Note
Both Employee Directory and Employee Directory (Entra ID) have similar settings regarding custom user properties.
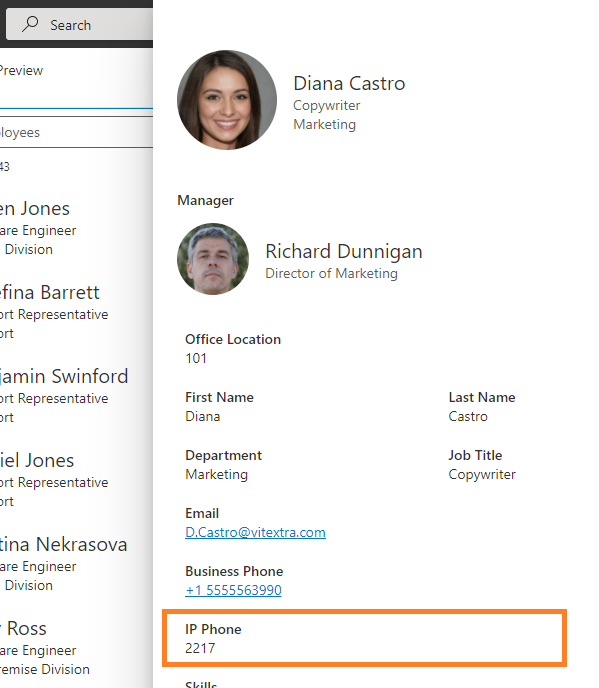
Once the custom attributes are defined and marked as visible, they will appear in the employee details pane:

Finally, publish the page to save your changes and make the custom attributes accessible to users.
Summary
In summary, extending directory objects with custom attributes in Entra ID enhances the functionality of the Employee Directory web part in SharePoint and Microsoft Teams.
By following the steps outlined in this article, you can successfully retrieve and display these attributes, improving user experience and information accessibility within your organization.
For further assistance, consider exploring additional resources or reaching out to your IT support team.