Employee Directory
This article explains how to show custom SharePoint user profile properties in the Vitextra Employee Directory web part when it uses the User profiles data source: how to prepare the property in SharePoint, how to make it available through search, and how to add it to the web part as a custom column.
Introduction
Besides the built-in fields (name, job title, department, phones and so on), the Employee Directory web part can show any additional attribute you need - a cost center, an employee number, a building, a hobby. These additional attributes are called custom columns and are configured in the Custom Columns editor of the web part.
With the User profiles data source, the web part reads employee data through SharePoint search. A custom user profile property therefore becomes available to the web part only after it is indexed by search and mapped to a managed property. The whole process takes three steps:
- Create (or reuse) a user profile property and make it indexed.
- Map its crawled property to a retrievable managed property in the search schema.
- Add the managed property to the web part as a custom column.
💡 Tip
If the web part reads data from Microsoft Entra ID (the Employee Directory (Entra ID) web part, or Employee Directory with the Entra ID (Azure AD) data source), custom attributes work differently. See KB10060. How to Display Custom Entra ID Attributes in the Employee Directory Web Part.
Prepare the user profile property
The steps in this section are done in the SharePoint admin center and require SharePoint administrator rights. If the property you want to show already exists and is mapped to a managed property, skip to Add the custom column to the web part.
Create the user profile property
- In the SharePoint admin center, go to More features, and under User profiles select Open.
- Under People, select Manage User Properties, and then select New Property.
- Enter the Name (the internal name, for example
CostCenter), the Display Name and the Type. - Under Search Settings, select Indexed. Without this option the property is not crawled and can't be shown by the web part.
- Set the policy and edit settings as your organization requires and select OK.
Fill in the property for your users - in the profile, by your import process or by a script. Search creates the crawled property People:<Name> (for example People:CostCenter) when it crawls profiles that have a value for the property.
💡 Tip
See the How to Create a Custom Searchable User Profile Property guide for more details.
Map it to a managed property
- In the SharePoint admin center, go to More features, and under Search select Open.
- Select Manage Search Schema.
- Choose a managed property for the value. The easiest option is one of the unused built-in properties
RefinableString00–RefinableString99: they are already queryable, retrievable, refinable and sortable. You can also create a new managed property of type Text with the Retrievable option turned on. - Open the managed property, and under Mappings to crawled properties select Add a Mapping, find
People:<Name>and add it. - Save the managed property.
❗ Important
The managed property must be Retrievable; otherwise search does not return its value and the custom column stays empty. Changes to the search schema take effect only after the user profiles are crawled again, which can take from several hours to a day or more in large tenants.
Write down the exact name of the managed property, for example RefinableString05 - you'll enter it in the web part.
Add the custom column to the web part
- Open the page with the Employee Directory web part, select Edit, and then select the edit (pencil) icon of the web part to open its property pane.
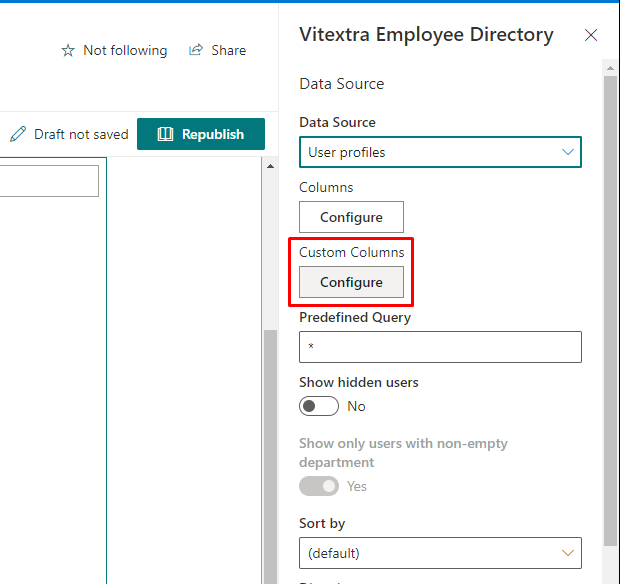
- In the Data Source section, make sure Data Source is set to User profiles.
- Under Custom Columns, select Configure.
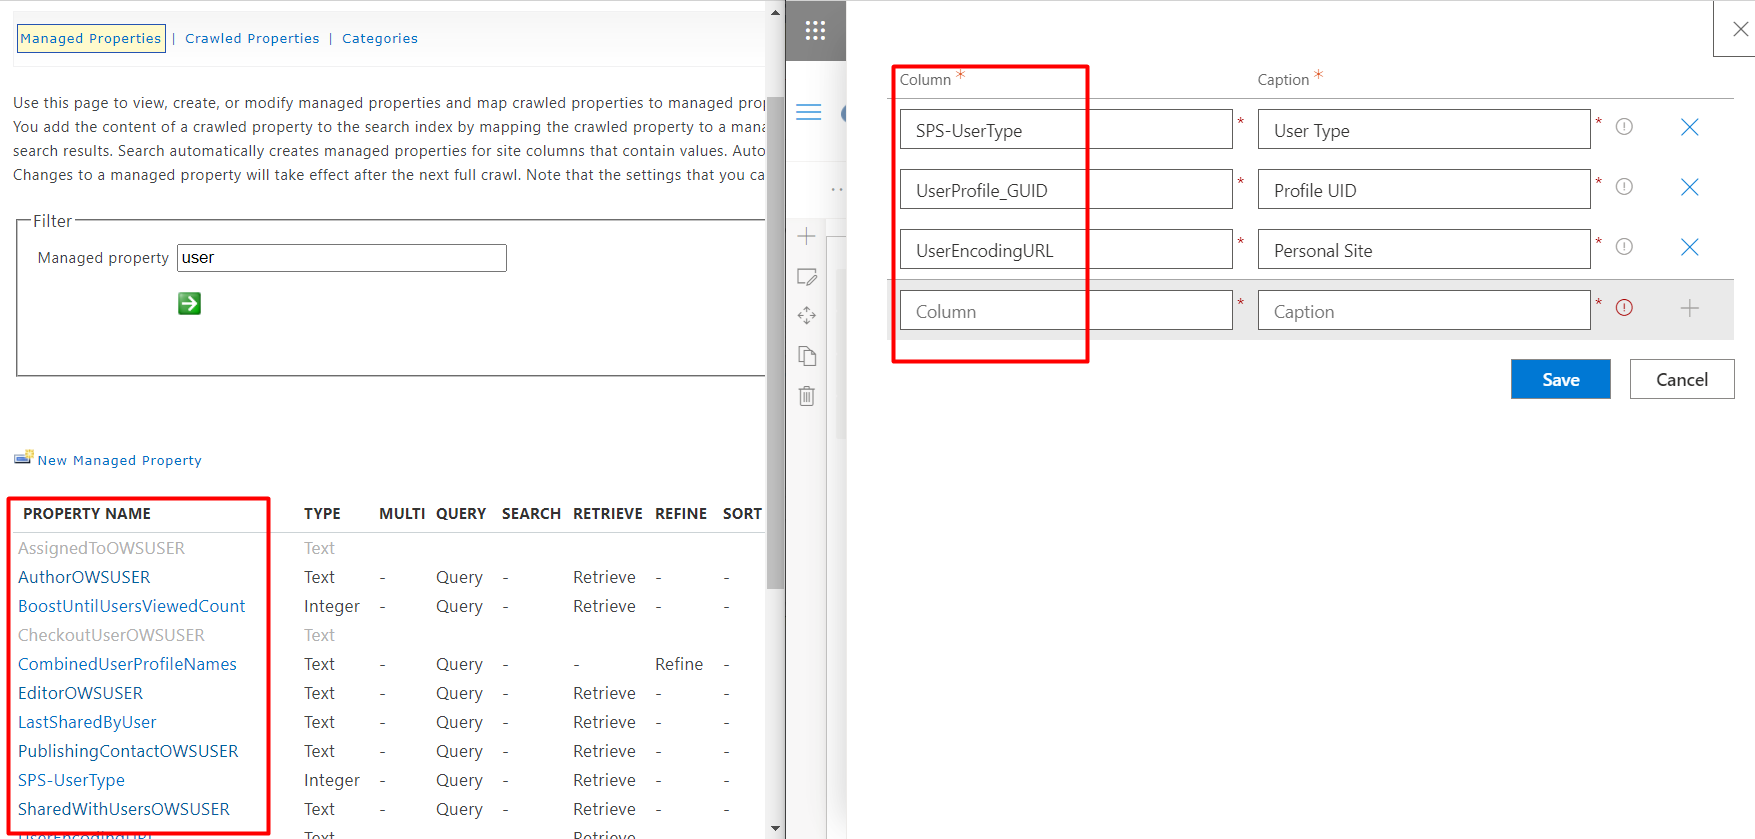
- The Columns panel opens. In the empty row at the bottom of the table, enter the managed property name in Column and the label your users will see in Caption, and choose where the column is shown.
- Select Add new item (the plus icon at the end of the row). The column is added to the table. Repeat for each attribute you need.
- Use Order to change the position of the columns, and select Save.
- Republish the page.
Each custom column has the following settings:
| Setting | Description |
|---|---|
| Show in list | Shows the attribute as a column in the Details view and includes it in the Excel export. Selected by default for a new row. |
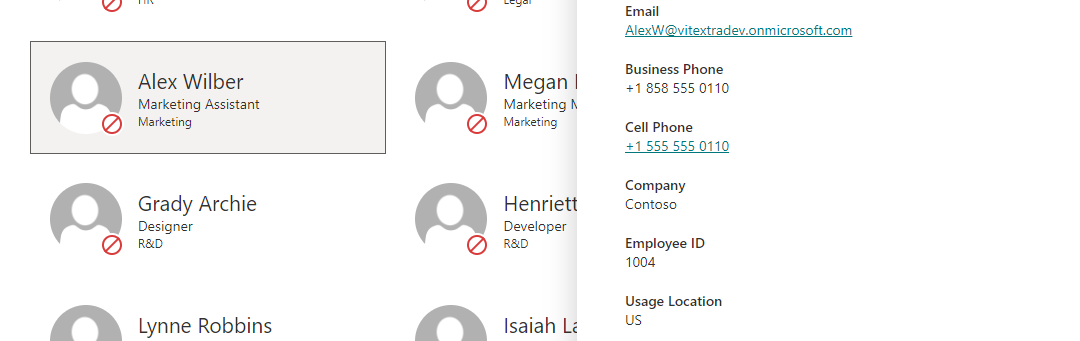
| Show on card | Shows the attribute in the employee details pane that opens when you select a person. |
| Column | The managed property name, for example RefinableString05. Enter it exactly as it is spelled in the search schema. Required. |
| Caption | The label shown as the column header and in the details pane, for example Cost Center. Required. |
| Order | The position of the column among the custom columns. Custom columns are placed after the built-in columns. |
To remove a custom column, select Delete Row (the trash can icon) at the end of its row and then select Save. Cancel closes the panel without applying your changes.
📝 Note
The Employee Directory web part keeps one list of custom columns for both data sources. If you switch Data Source between User profiles and Entra ID (Azure AD), review the custom columns: managed property names are valid only for User profiles.
Where custom columns appear
Once saved, a custom column can be used in the same places as the built-in fields:
- Details view - as a column of the list, when Show in list is selected.
- Details pane - below the built-in attributes, when Show on card is selected and the person has a value. See KB10199. Employee Directory: Customizing the Details Pane.
- Contact cards - as one of the card lines selected in the Content Fields section.
- Group by - the Group by dropdown in the Appearance section lists every custom column, so you can group people by, for example, cost center or building.
- Export to Excel - columns with Show in list selected are included in the exported spreadsheet.
- Refinement panel - a refinable managed property (such as
RefinableString05) can also be added as a refiner. See KB10313. How to Set Up the Refinement Panel in Employee Directory.
💡 Tip
For layouts, card fields and grouping, see KB10314. Employee Directory Layouts: Details and Cards, Card Size, Card Fields and Group By. For the export, see KB10062. How to Export Employee Directory Results to Microsoft Excel.
If a custom column is empty
If the column or the details pane shows no value, check the following:
- The user profile property is marked Indexed, and the person actually has a value for it.
- The crawled property
People:<Name>is mapped to the managed property, and the managed property is Retrievable. - Profiles have been crawled since you changed the search schema - new mappings are not applied immediately.
- The name in Column matches the managed property name exactly.
The details pane shows a custom attribute only when it contains data, so an empty value is simply not displayed.
Microsoft Entra ID data source
When the web part reads data from Microsoft Entra ID through Microsoft Graph, a custom column refers to a property of the Entra ID user object - a standard user property, a directory extension (extension_{appId}_{name}) or one of the on-premises extension attributes extensionAttribute1–extensionAttribute15 - instead of a managed property. The search schema is not involved.
💡 Tip
For the supported attribute types, how to find their names and the extra Searchable option of the Employee Directory (Entra ID) web part, see KB10060. How to Display Custom Entra ID Attributes in the Employee Directory Web Part.